Enhancements

Carson; 05-26-13; 9:00 PM; f/2.6; 1/15; SONY DSC-W570

  Carson; 05-26-13; 9:00 PM; f/2.6; 1/15; SONY DSC-W570

This one was point and shoot. I arranged my nephew so that he looked like he was getting ready for bed (which he actually was). Then, I did a flexible brushed-on effect in photoshop, and did it with carrying opacities and brushes.

Heather; 05-21-13; 8:45 PM; f/5.6; 1/10; Canon EOS REBEL T3i; Flash

  Heather; 05-21-13; 8:45 PM; f/5.6; 1/10; Canon EOS REBEL T3i; Flash

For this one, I took the photo at sunset and tried to get some rembrandt lighting. Then, I added posterize filter, and adjusted the levels.

Portraits

Full-body; 5-25-13; 12:05PM; Rexburg; f/4.4; 1/19; NIKON COOLPIX S560

  Full-body; 5-25-13; 12:05PM; Rexburg; f/4.4; 1/19; NIKON COOLPIX S560

This one was largely point and shoot- I adjusted levels in photoshop.

Group Aware; 05-23-13; 10:08 PM; f/5.0; 1/320; Canon EOS REBEL T3i; Tripod; Flash

   Group Aware; 05-23-13; 10:08 PM; f/5.0; 1/320; Canon EOS REBEL T3i; Tripod; Flash

I set up the flash to be on the wall to the left, to bounce the light back at them, and took the photo. Then, i adjusted levels in photoshop and saturation.

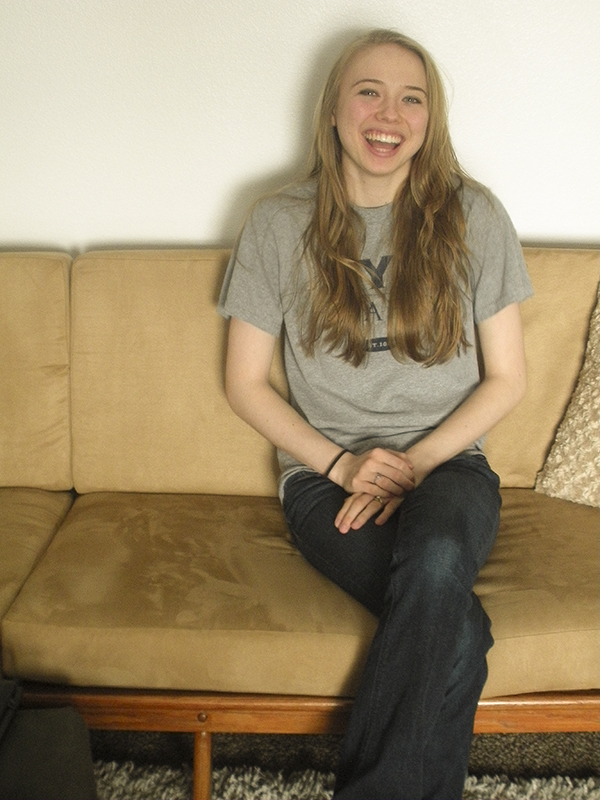
Head and Shoulders; 05-21-13; 8:30 PM; f/5.6; 1/30; Canon EOS REVEL T3i; Flash

  Head and Shoulders; 05-21-13; 8:30 PM; f/5.6; 1/30; Canon EOS REVEL T3i; Flash

For this one, I had a light flash from the side, and took it right at sunset. In Camera RAW I turned the background yellow, and removed blemishes.

Side Composition; 05-25-13; 12:05 PM; f/5.4; 1/50; Nikon COOLPIX S560

  Side Composition; 05-25-13; 12:05 PM; f/5.4; 1/50; Nikon COOLPIX S560

I sat her next to the window and took the photo, and then turned up contrast in Camera RAW and and turned up highlights and shadows.

Work; 05-24-13; 11:00 PM; f/3.5; 1/50; Nikon COOLPIX S560

  Work; 05-24-13; 11:00 PM; f/3.5; 1/50; Nikon COOLPIX S560

This one was point and shoot, and then in camera RAW I turned the brightness of the freezer, and removed blemishes.

Camera RAW

Before

Hair Flip; 05-04-13; 8:10 PM; Sugar City; f/3.5; 1/1000; Canon EOS REBEL T3i

Hair Flip; 05-04-13; 8:10 PM; Sugar City; f/3.5; 1/1000; Canon EOS REBEL T3i

Piano; 05-04-13; 8:20 PM; Sugar City; f/3.5; 1/13; Canon EOS REBEL T3i

Piano; 05-04-13; 8:20 PM; Sugar City; f/3.5; 1/13; Canon EOS REBEL T3i

After

Piano 800

For this photo, I opened the picture in Adobe bridge, and then hit Command-R on the keyboard to open it in Camera RAW. From there, I turned up the saturation, the sharpness, and changed the hue to be more red. Then, I turned up the brightness and the contrast. Then, I clicked “done” and it took me back to bridge.

Heather Hair Flip 800

For this photo, I opened it in Adobe Bridge, hit Command-R to open it in Camera RAW, and increased brightness, and saturation, and contrast. From there, I turned reds down to make the subject’s face a little less red, and then used the patch tool to get rid of blemishes.

Panorama

Field Pano 1000

For this one, I took six photos. In photoshop, I merged them together, and then filled in the gaps using content- aware fill. I then increased the levels, increased saturation, and changed to the hue to be slightly more blue. Then I removed the people and a few issue spots using the patch tool.

Spori Pano 1000

For this one I took four photos. In photoshop I merged them together and filled in the gaps using content-aware fill. Then I did some touch-up work with the patch tool, and removed a person on the left side of the photo, and then increased saturation, adjusted levels, and changed the hue to be slightly more blue.

Clark; 05-18-13; 6:05 PM; Spori Quad; f/5; 1/80; Canon EOS REBEL T3i

Clark; 05-18-13; 6:05 PM; Spori Quad; f/5; 1/80; Canon EOS REBEL T3i


Clark/Smith;05-18-13; 6:05 PM; Spori Quad; f/5; 1/60; Canon EOS REBEL T3i

Clark/Smith;05-18-13; 6:05 PM; Spori Quad; f/5; 1/60; Canon EOS REBEL T3i


Smith/McKay; 05-18-13; 6:05 PM; Spori Quad; f/5; 1/60; Canon EOS REBEL T3i

Smith/McKay; 05-18-13; 6:05 PM; Spori Quad; f/5; 1/60; Canon EOS REBEL T3i


McKay/Romney; 05-18-13; 6:05 PM; Spori Quad; f/5; 1/60; Canon EOS REBEL T3i

McKay/Romney; 05-18-13; 6:05 PM; Spori Quad; f/5; 1/60; Canon EOS REBEL T3i


Romney; 05-18-13; 6:05 PM; Spori Quad; f/5; 1/60; Canon EOS REBEL T3i

Romney; 05-18-13; 6:05 PM; Spori Quad; f/5; 1/60; Canon EOS REBEL T3i


Romney 2; 05-18-13; 6:09 PM; Spori Quad; f/5; 1/60; Canon EOS REBEL T3i

Romney 2; 05-18-13; 6:09 PM; Spori Quad; f/5; 1/60; Canon EOS REBEL T3i


Spori Left; 05-18-13; 6:11 PM; Spori; f/5.6; 1/80 Canon EOS REBEL T3i

Spori Left; 05-18-13; 6:11 PM; Spori; f/5.6; 1/80 Canon EOS REBEL T3i


Spori mid/left; 05-18-13; 6:11 PM; Spori; f/5.6; 1/80; Canon EOS REBEL T3i

Spori mid/left; 05-18-13; 6:11 PM; Spori; f/5.6; 1/80; Canon EOS REBEL T3i


Spori mid/right; 05-18-13; 6:11 PM; Spori; f/5.6; 1/80; Canon EOS REBEL T3i

Spori mid/right; 05-18-13; 6:11 PM; Spori; f/5.6; 1/80; Canon EOS REBEL T3i


Spori Right; 05-18-13; 6:11 PM; Spori; f/5.6; 1/80; Canon EOS REBEL T3i

Spori Right; 05-18-13; 6:11 PM; Spori; f/5.6; 1/80; Canon EOS REBEL T3i


Flora and Fauna Edits

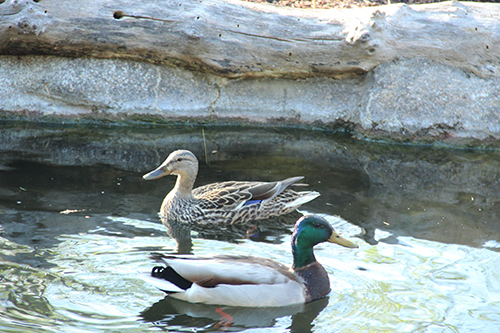
Ducks; 05-08-13-6:45 PM; BYU-I Gardens; f/5.6; 1/64; Canon EOS REBEL T3i

Ducks; 05-08-13-6:45 PM; BYU-I Gardens; f/5.6; 1/64; Canon EOS REBEL T3i

For this shot, I took the photos in auto mode, then I turned up the brightness of the image and masked the rest of the image out with about 50% opacity. Then I sharpened the whole image and then masked everything out except the ducks, and

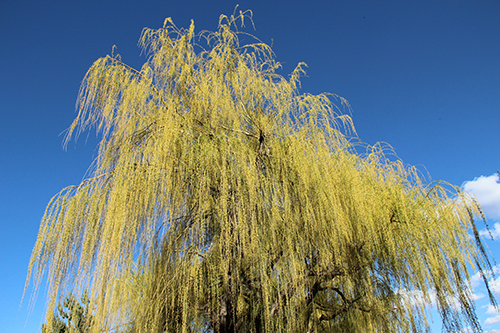
Weeping Willow; 05-08-13; 6:20 PM; BYU-I Gardens; f/11; 1/500; Canon EOS REBEL T3i

Weeping Willow; 05-08-13; 6:20 PM; BYU-I Gardens; f/11; 1/500; Canon EOS REBEL T3i

For the tree, I turned my shutter speed up, and then tuned up the Hue and saturation in photoshop, while masking out much of the sky, then turned the levels up on the whole thing, and sharpened the tree, masking out as much of the sky as possible.

Ducks Raw 800 Tree Raw 800

Flora and Fauna

Ducks 2; 05-08-13; 6:45 PM;  f/5.6; 1/125; Canon EOS REBEL T3i

  Ducks 2; 05-08-13; 6:45 PM; f/5.6; 1/125; Canon EOS REBEL T3i

For this photo, I just shot with the auto mode, and then added brightness and saturation in photoshop.

Purple; 05-08-13; 6:23 PM; BYUI Gardens; f/11; 1/32; Canon EOS REBEL T3i

  Purple; 05-08-13; 6:23 PM; BYUI Gardens; f/11; 1/32; Canon EOS REBEL T3i

I took this photo with a small aperture, and then adjusted levels and added sharpness to the flower itself.

Blossom; 05-08-13; 12:25 PM; f/13; 1/400; Canon EOS REBEL T3i

  Blossom; 05-08-13; 12:25 PM; f/13; 1/400; Canon EOS REBEL T3i

Again with a small aperture here, I added sharpness and adjusted the levels in photoshop.

Blending Modes

The Middle; 05-03-13; 1:34 PM; f/9; 1/200; Canon EOS REBEL T3i
  The Middle; 05-03-13; 1:34 PM; f/9; 1/200; Canon EOS REBEL T3i
For this shot, I simply took the photo without any priority modes. In editing it, I created a new layer, added type, moved the layer above the background layer, and then turned the opacity down, until it blended with the field.

Waterfall; 05-03-13; 12:03 PM (Texture), 7:30 PM (Waterfall); f/10 (Waterfall), f/5 (Texture(; 1/10 (waterfall), 1/60 (texture); Tripod (waterfall)

  Waterfall; 05-03-13; 12:03 PM (Texture), 7:30 PM (Waterfall); f/10 (Waterfall), f/5 (Texture(; 1/10 (waterfall), 1/60 (texture); Tripod (waterfall)

For this photo, I used a tripod so that I could get a longer exposure and blur the waterfall. For the texture, it is the floor in the Spori foyer, and to blend them, I superimposed the waterfall on top of the texture, and turned the opacity down, so that the waterfall was still prevalent, but the texture was easily visible as well.

Color Study

Heather's Eyes; 05-04-13; 1:50 pm; f/5.6; 1/125; Canon EOS REBEL T3i

  Heather’s Eyes; 05-04-13; 1:50 pm; f/5.6; 1/125; Canon EOS REBEL T3i

For this one, I made the aperture small to blur the background, and gave my wife’s eyes a little color pop in photoshop. I also got rid of blemishes in photoshop.

Jeans; 05-04-2013; 1:30 PM; f/4.5; 1/50; Canon EOS REBEL T3i; tripod

  Jeans; 05-04-2013; 1:30 PM; f/4.5; 1/50; Canon EOS REBEL T3i; tripod

For this photo, I used a timer and tripod so that I could be in this picture. We had great lighting from the window, and added a black and white mask, then painted over the mask to let the color of our jeans show through. I also got rid of a computer cord and headphones.

Recycle; 05-03-13; 8:00 PM; f/5.6; 1/100; Canon EOS REBEL T3i

  Recycle; 05-03-13; 8:00 PM; f/5.6; 1/100; Canon EOS REBEL T3i

This photo was taken of a recycling bin in the Ricks building. I cropped it and brightened it in photoshop.

Twenty-Three; 05-03-13; 1:30 PM; f/10; 1/250; Canon EOS REBEL T3i

  Twenty-Three; 05-03-13; 1:30 PM; f/10; 1/250; Canon EOS REBEL T3i

for this photo, I turned the aperture setting up, so that I could have focused numbers in the foreground and the background. I popped the color up, and increased the sharpness for the 2 and the 3. (I happen to be 23, so why not?)

Priority Settings Case Study

Flower: 05-01-23; 11:45 AM; Library Amphitheater; f/5.6; 1/4000; Canon EOS Rebel T3i

  Flower: 05-01-23; 11:45 AM; Library Amphitheater; f/5.6; 1/4000; Canon EOS Rebel T3i

I set the aperture on this one pretty large to get the blurry background. Then, I brightened and sharpened it in photoshop.

05-01-13; 11:25 AM Library Amphitheater; f/18; 1/1000; Canon EOS Rebel T3i

  Amphitheater; 05-01-13; 11:25 AM Library Amphitheater; f/18; 1/1000; Canon EOS Rebel T3i

I set the aperture on this one very small so as to get as much as possible into focus. I also tried to line up the corners of the grass tiers . I also brightened and turned the contrast up on this one in photoshop.

05-01-13; 6:25 PM; BYUI Gardens; f/4.5; 1/1000; Canon EOS Rebel T3i

  Spread Eagle; 05-01-13; 6:25 PM; BYUI Gardens; f/4.5; 1/1000; Canon EOS Rebel T3i

I had my wife jump doing different things about 20 times before we finally got one worth keeping. Shutter speed was set high here, and the brightness was turned up.

05-01-13; 6:35 PM; BYUI Gardens; f/16; 1/64; Canon EOS Rebel T3i

  Running; 05-01-13; 6:35 PM; BYUI Gardens; f/16; 1/64; Canon EOS Rebel T3i

I set the shutter speed pretty low on this one, and set the camera on a retaining wall so that the stationary objects in the background would remain in focus. This one was brightened.